
Integrate Kakitangan.com Payroll data into Intuit Quickbooks Accounting system
It is very simple!
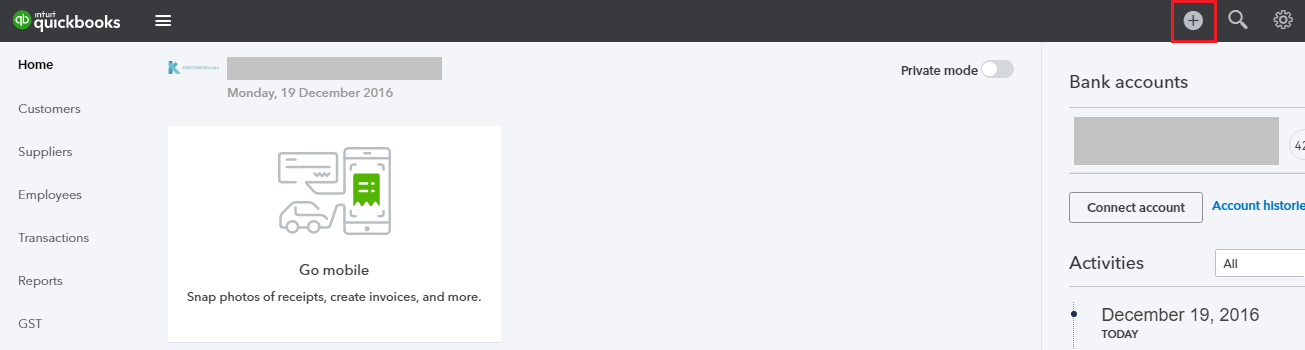
- At Quickbooks, click on the “Plus Sign”
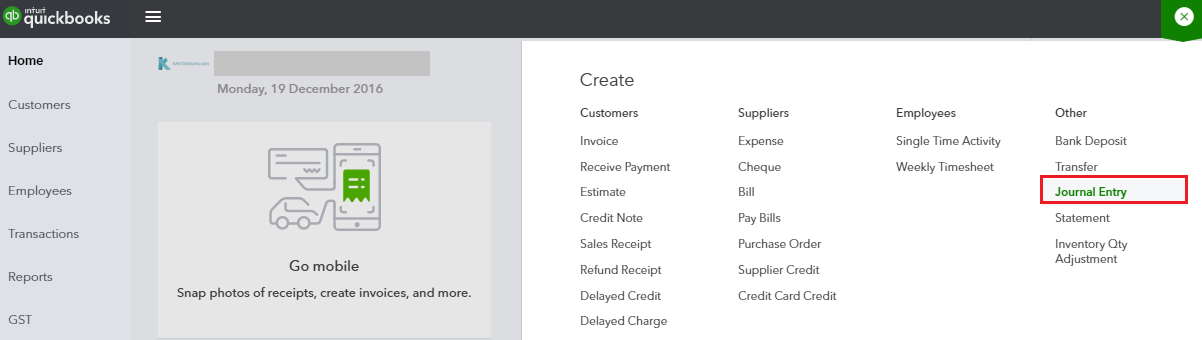
- Click on “Journal Entry”
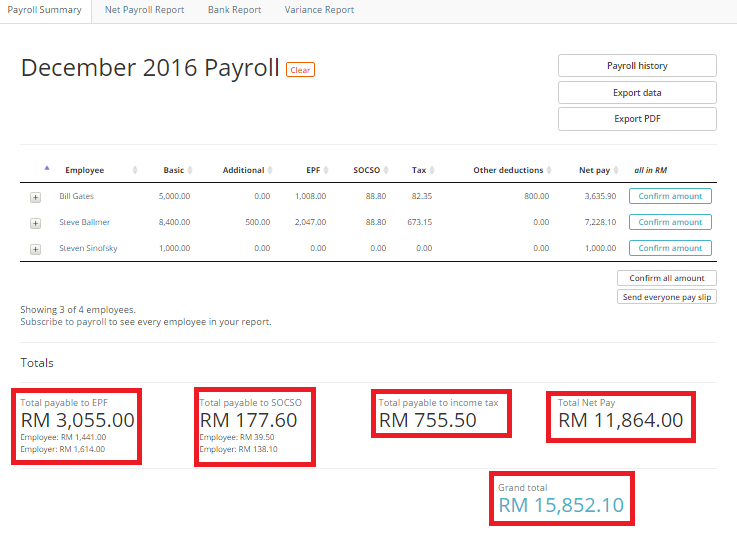
- Let’s make the entries using Kakitangan.com Payroll Summary example below:
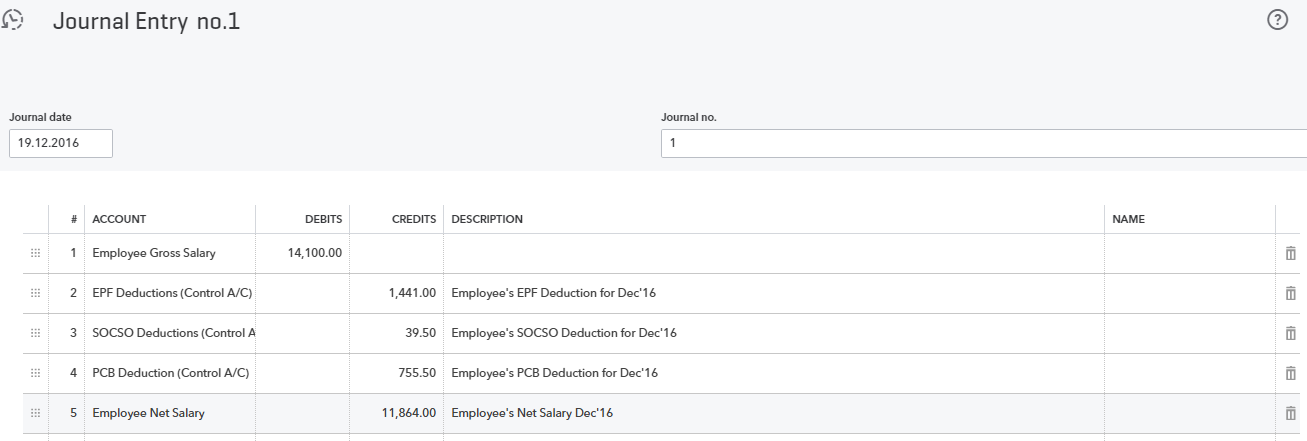
Step 1 - Journal Entry for Employee’s Portion
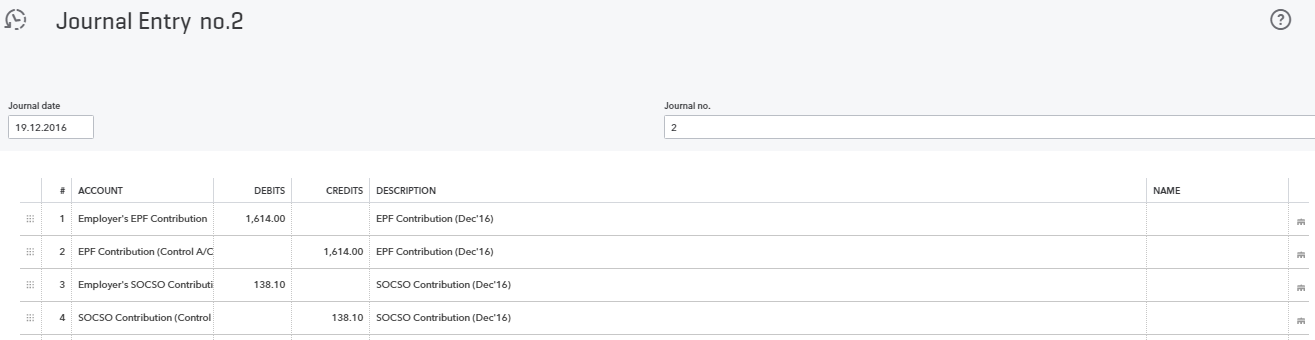
Step 2: Journal Entry for Employer’s Portion
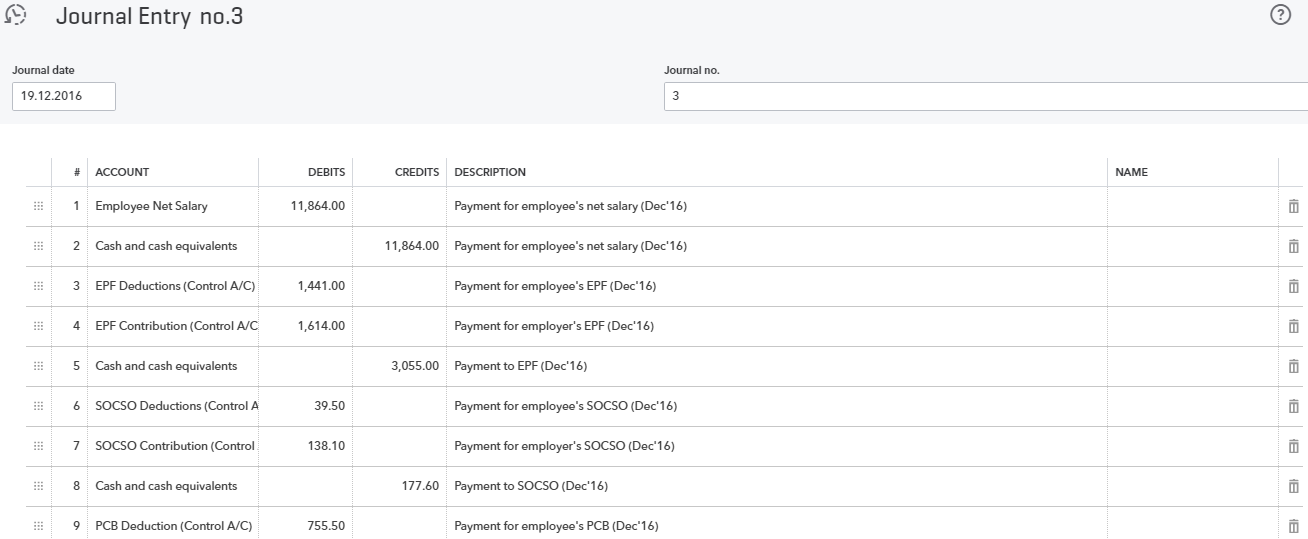
Step 3: Journal Entry for all payments: Salary, Deductions and Contributions (Employee + Employer’s Portion)
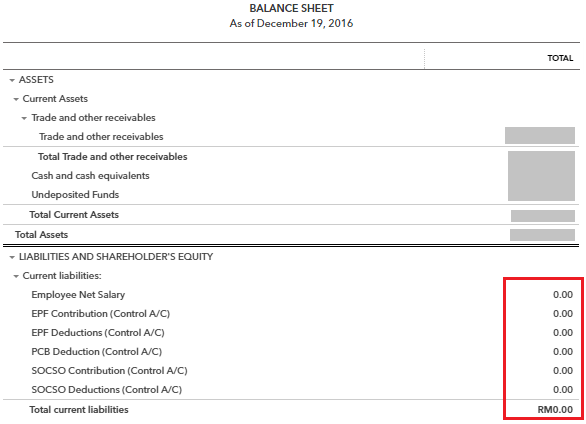
After all payments are made, check your balance sheet.
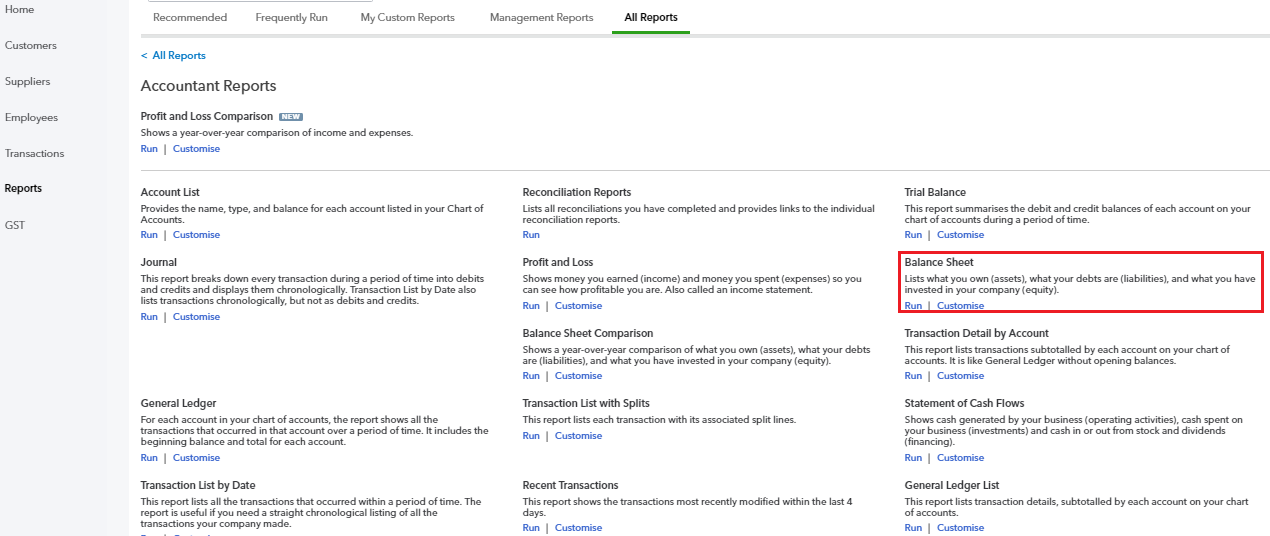
Go to Reports > All Reports > Accountant Reports > Balance Sheet
All controls accounts balances will be 0 if payment is made in full.
Detail explanations on why are we doing this, are documented here: /3-steps-to-get-payroll-data-into-your-accounting-system/