Complete guide: Claims module
First time using our Claims module? Here is the complete guide for you, consists of three parts :
Claims settings
Go to Claims tab, click Settings.
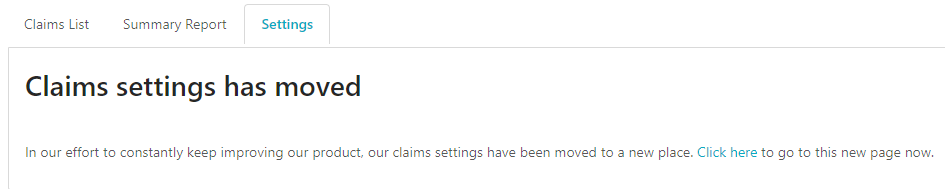
The settings page has been moved, click "click here" to be re-directed to that page.
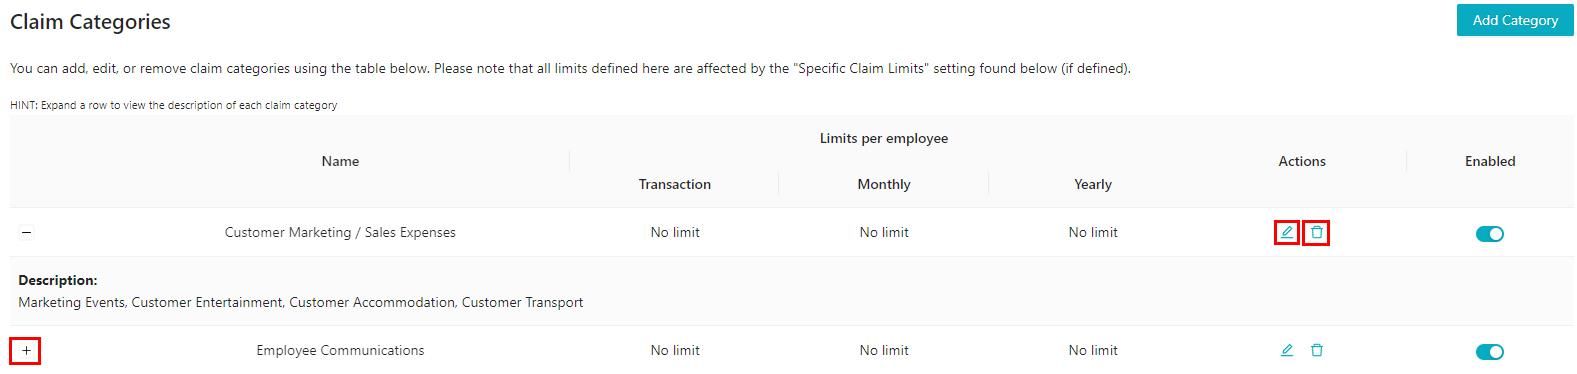
Here is where you can setup claims categories. Use the pencil icon to edit the name of the category or description and rubbish bin icon to remove it. Click on the + sign to view the description of the claims.
On the right, you can set the limit for each category by Transaction, Monthly and Yearly for your employees, for example, if you set RM200 for monthly limit, it would mean that every month, each employee's limit for that category is limited to RM200. Once that limit is reached, the employee will not be able to submit claims from that category. You may also disable that category if it is not applicable to your company.
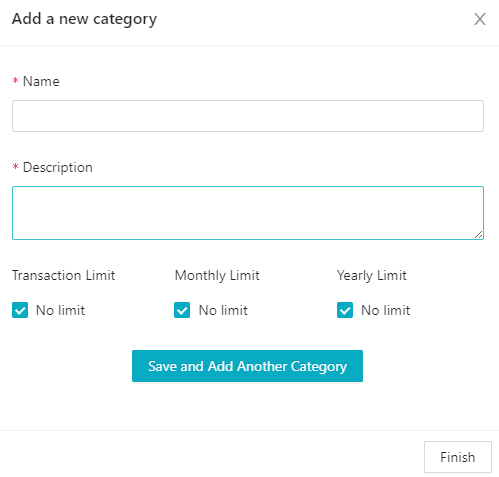
Use Add Category, to create a new category.
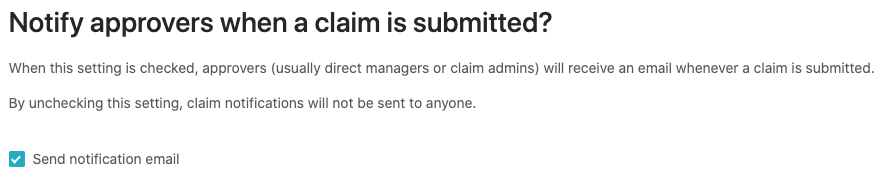
By ticking this setting, an email will be sent to the manager once a claim has been submitted. Companies with a lot of employees would usually turn this setting off, because the manager would be flooded with too many claims submission emails.

If employees are required to submit an attachment when submitting a claims, do tick this setting.

If employees are required to write down any notes, do tick this setting.

In the Claims List, if you wish to also view terminated employees' claims, feel free to enable it here.
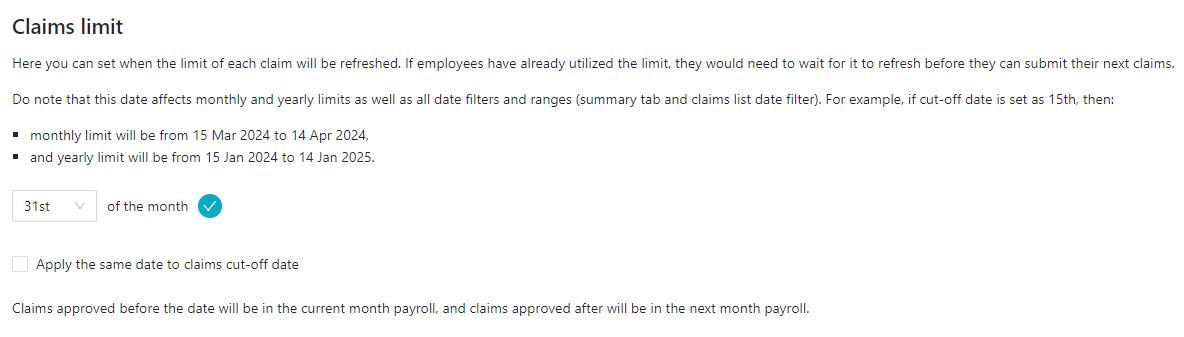
This will affect claims' limit that is set in Categories and "Apply the same date to claims cut-off date" will affect payroll.

If you have extra information that employees need to fill in when they are submitting a claims, you can creat it here.
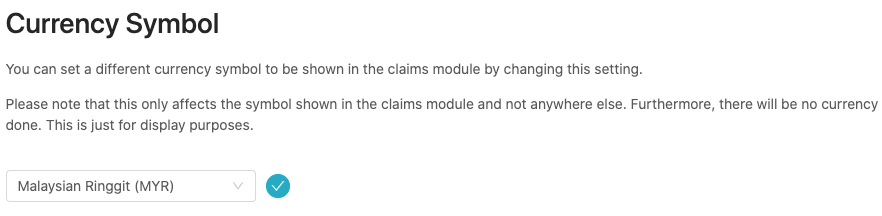
You can change the currency symbol of claims and this is only applicable to claims module. It will apply to all claims and not just specific claims submitted.
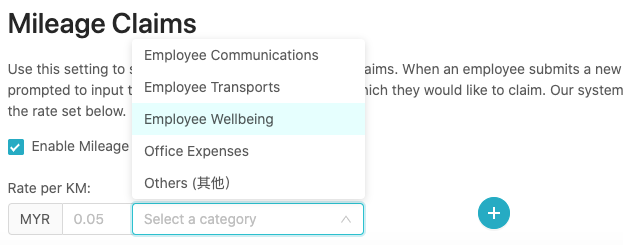
If your company practices mileage claims, select the category that is applicable to this and add the rate per km and click + to add it. When employees submit a claim that is applicable to mileage claims, they can key in the km travelled and our system will calculate the amount automatically.

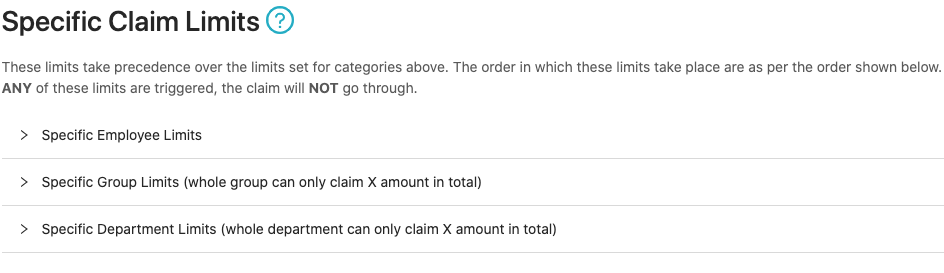
If specific employee(s)/group(s)/department(s) have different limits than others, you can setup the limit here.
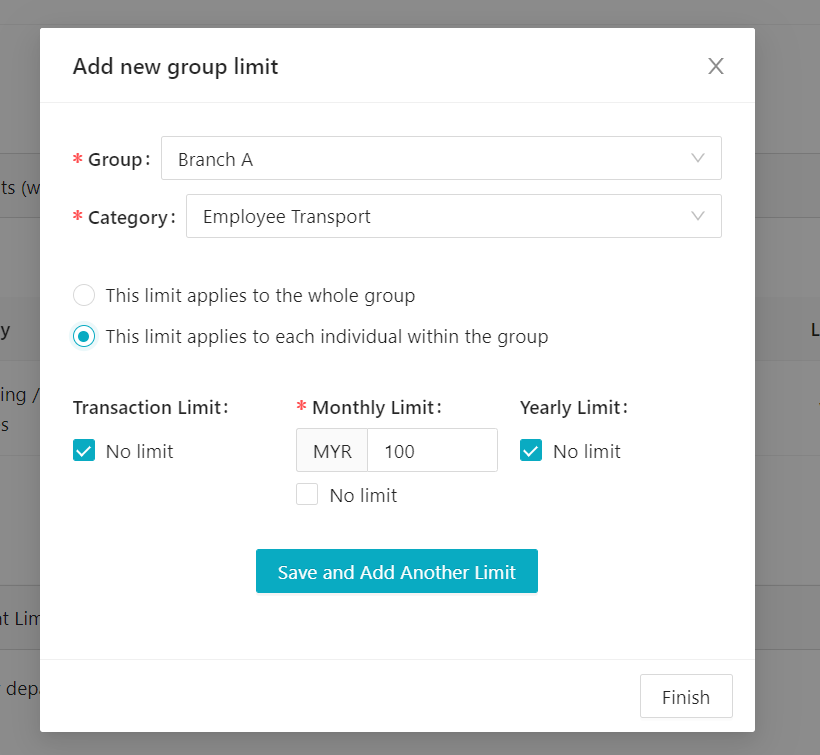
For example: Create a user group to categorize their limit on claims category. As above, Branch A group has 15 employees and each individual within Branch A can apply up to RM100 monthly for Employee Transport.
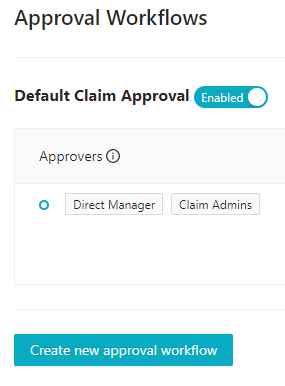
If you have a different claims approval workflow, use "Create new approval workflow" to create one that suits your company.
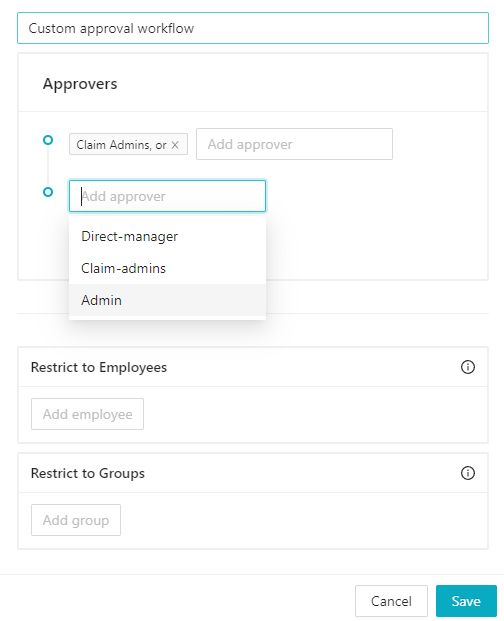
This is where you can customize everything. If you set two people next to each other, it means that they are the same level and if one person is above the other, it means that the one above is the approver. You can also choose the employees or groups that are part of this workflow.
Submitting claims
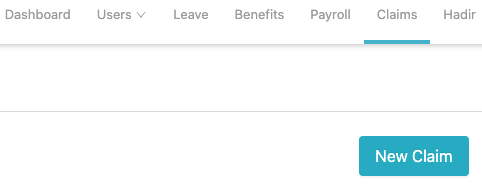
Go to Claims tab and click New Claim at Claims List

Select the category and key in all the details and click Submit Claim. After the claims is successfully submitted, an email will be sent to the manager to approve or reject the claims.

After a claim has been submitted, it will appear in the Claims List.
- There are 3 buttons to be actioned upon, approve, reject, or delete.
- If the claim is being rejected, the manager or claims admin would need to write down the reason(s).
- At the bottom of the claims list, there is a scroll bar, scroll right to view more details of the claim, including attachments.
- After you have approved a claim, Settle claim will appear.
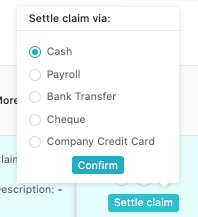
- Click at Settle claim after you have made payment of the claim and select the method that you used to make the payment.
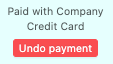
- After you have selected the method, it will be recorded. If wish to undo the action click Undo payment.
Filtering options
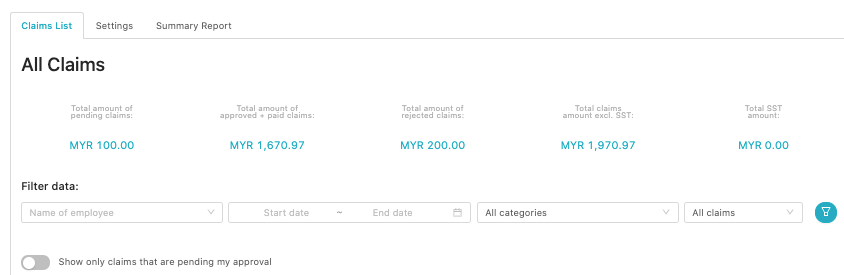
You can filter the claims that you wish to view, by filtering via:
- Name of the employee
- Date
- Claim's categories
- Claim's status (pending/approved/rejected/paid)
After you have filtered it based on the criterias that you wish to view, click at the filter data button that is next to All claims to re-generate the list.
Right below Name of employee, you can turn on the setting to only display the claims that are pending your approval as well.
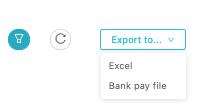
On the right of filter data, you can choose to a) export out the claims list into an excel file b) generate a bank pay file to make payment, the banks currently available are CIMB, M2U Bulk, and HSBCnet Bulk.
Batch feature
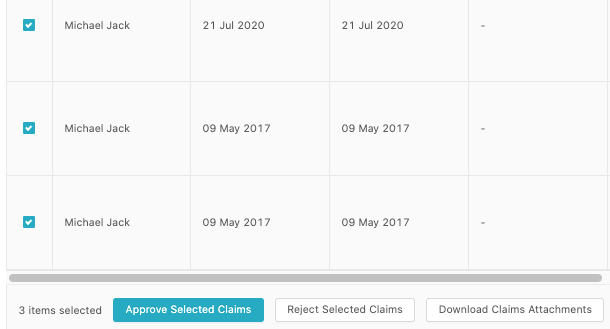
In the Claims List, you can select each of the claims and at the bottom of the page, you can choose to a) Approve Selected Claims b) Reject Selected Claims c) Download Claims Attachments (this will be sent to your email address).
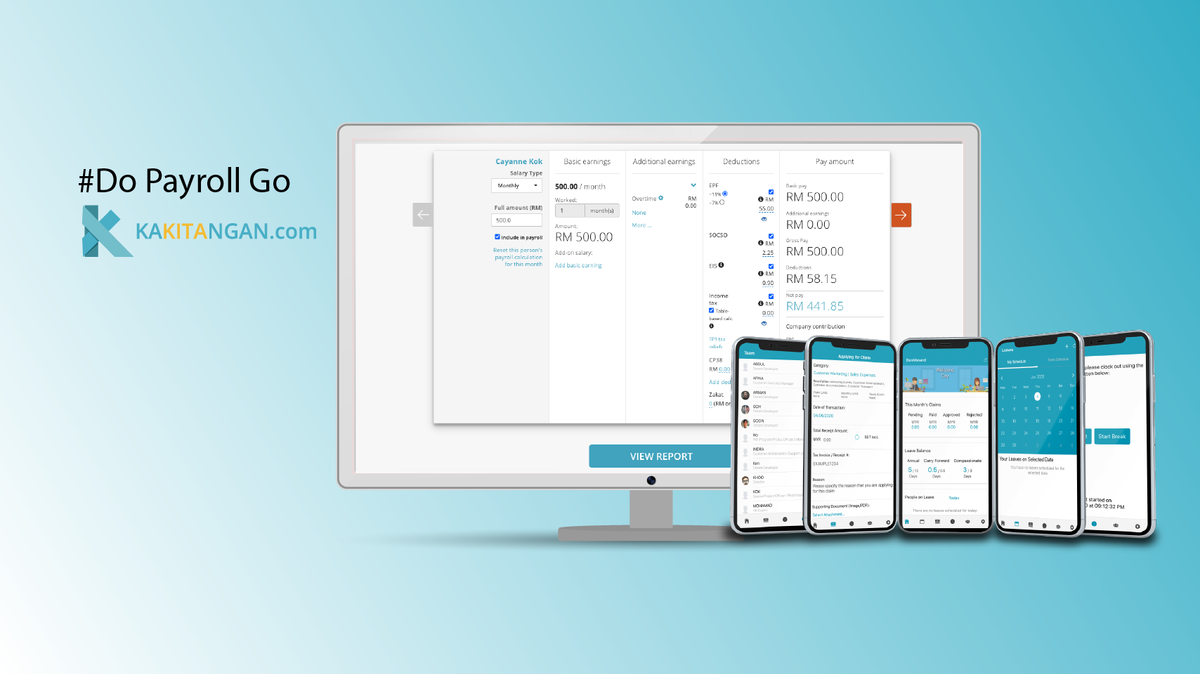
Linking Claims to Payroll
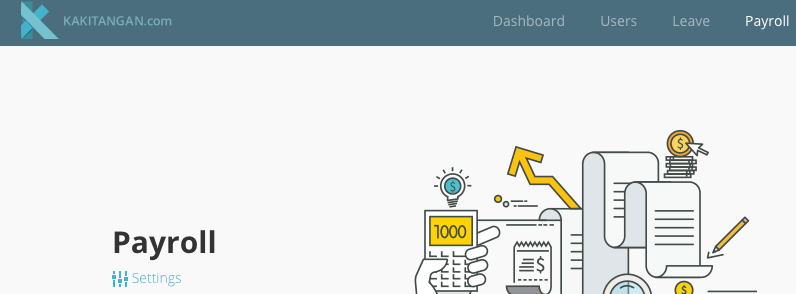
- Go to Payroll tab and go to Settings.

- In the page, look for Auto-link claims with payroll and tick this setting.
After you have performed these 2 steps, linking claims to payroll is done.
To make payment via payroll for claims:
- In Claims List, approve all the claims that is supposed to be included in this month's payroll.
- Go to payroll calculator and click Calculate
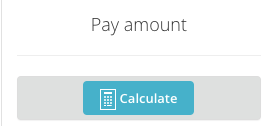
- After step 2, the sum of all the claims approved should appear at Claims under Additional earnings.

- Click View Report at the bottom of the page.

- In the Payroll Summary report, Click Confirm amount to finalize the payroll.

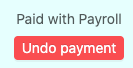
- After step 5 is done, the status of the claims in Claims List will change to Paid with Payroll.
If you encounter any issues when linking claims to payroll, please feel free to email to support@kakitangan.com and we will assist you on this.
Hope it helps!
 Kakitangan Blog