Complete guide: Hadir
A Time and Attendance module from Kakitangan.com - Hadir.
Hadir, time attendance dashboard provides business leadership with optics into shift-by-shift attendance behavior in real-time, making it easier for business leaders to spot employees' attendance. You can easily sort through which shift you want to view, and you can quickly identify attendance check-ins and dive in for a detailed view of each employee in the workplace.
1) How to create shift
1.1) Set up time, day and date
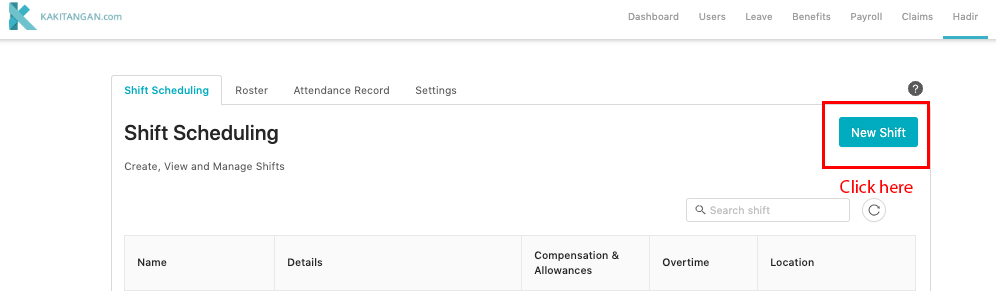
In order to monitor the employee work shift, the administrator will need to create the work shift from Shift Scheduling -> Create Shift. This feature is available for administrators to simplify the shift creation process.
A) The administrator able to create shift by clicking on New Shift to create on the right top
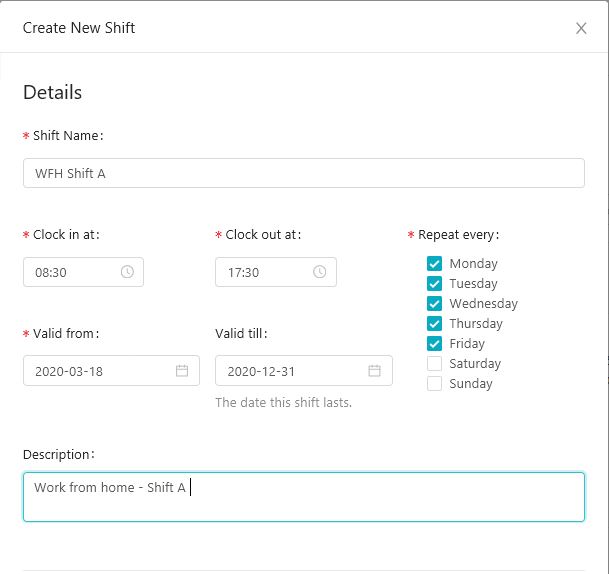
B) The administrator is required to fill in the details with star (*).
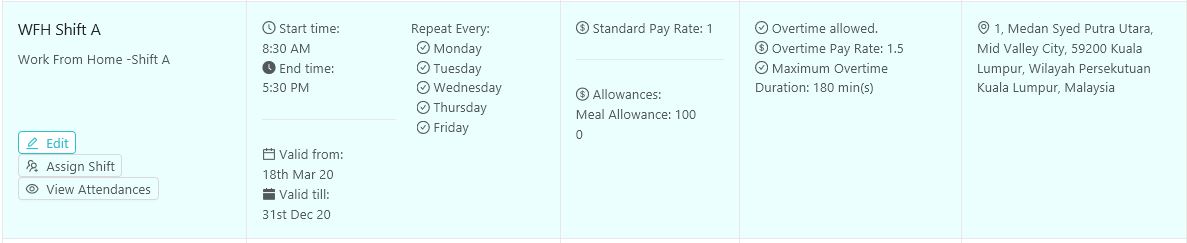
C) The administrator can name the shift eg (WFH Shift A), setup clock in and clock out time, set up the validity date, and giving some extra description for the shift. The final outcome should look like this.
1.2) Set up the Pay rate
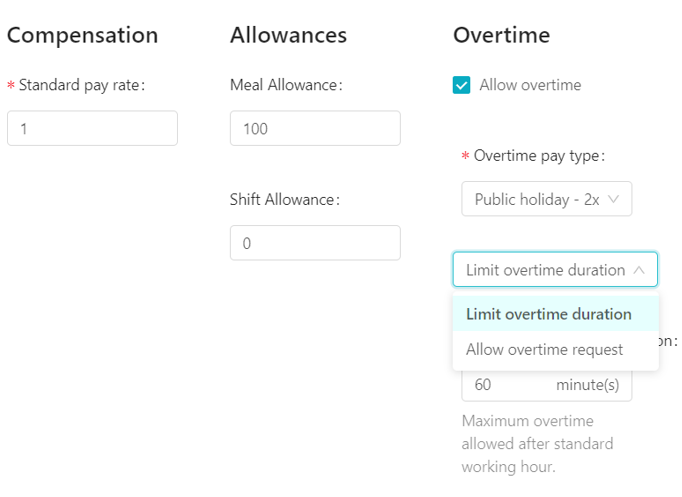
After above details are filled in, the administrators may scroll down and fill in the compensation, allowances and overtime.
- Standard pay rate - Base pay rate multiplier for this shift. Eg: Pay rate is 1.0
- Allowances - Meal or shift allowances amount for this shift. Eg: Meal allowance is RM100
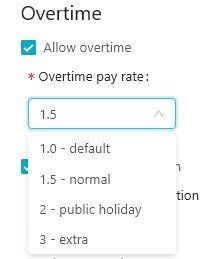
- Overtime pay rate - You may choose the pay rate multiplier for this shift. Eg: OT pay rate is 1.5
- Maximum Overtime Duration - You may limit the overtime duration for this shift. Eg: 180 minutes
Note: OT rate is customizable under our payroll settings.
In the event of the paid rate, the Administrators are able to set the pay rate of their employees. Like the compensation rate:
- Normal Pay rate: 1
- Overtime Rates (MYR): 1.5x / 2x multiplier for all hours worked
Scenario A
One New Year Eve, Ali works on 8-hour shifts as a service crew for a further 2 hours. She is paid RM10 an hour.
- The total pay is calculated as if no overtime occurs:
(8 hours x RM10/hour) = RM80 - The overtime pay of RM10/hour in the example is then multiplied by the number of OT hours & the OT multiplier of 1.5x to determine her bonus OT pay:
RM10/hour X 2 hours X 1.5 = RM30 - Ali's total pay for the day is her base pay without OT plus the bonus OT pay calculated with the payrate:
RM80 + RM30 = RM110
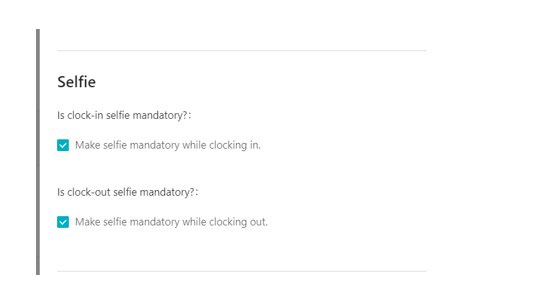
1.3) Selfie clock-in
Another way to clock-in via our Kakitangan app is via Selfie. Go to Hadir and under Shift Scheduling, click New Shift or click Edit on the existing shift, scroll down and look for Selfie options.
1.4) Locational Clock in
Hadir's real-time clock-in, clock-out with geolocation on Mobile app is designed to record employees' clock-in, clock-out and break time at the selected location(s). If an administrator creates a schedule for your (office) location, anyone in the team can clock-in via using the apps at the specific area only.
1.4.1) Turn on Locational Clock-in
To set up the feature, the administrators are required to enable locational clock-in. Once the feature turns on, it allows the employees to clock-in from the location set by the administrator.
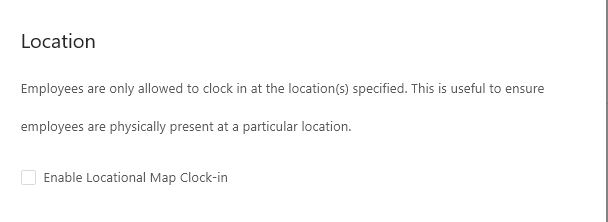
Quick tip: Current radius is set at 200m.
1.4.2) Pin the location
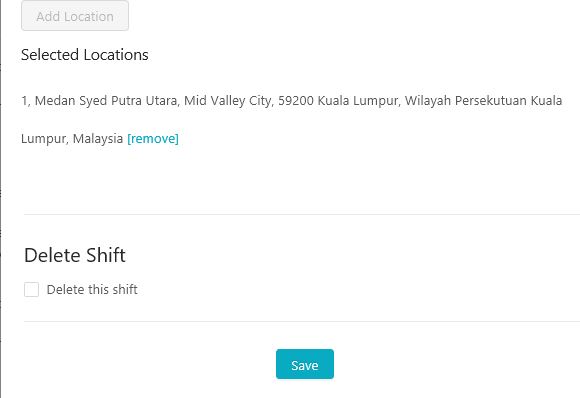
After enabled, the administrator can search for the specific location for this shift. Once it pins to the right location, just clicks Add Location and then it is ready to go.

Newly added function where you could also enable the same clock-in location for clock-out in each individual shift.
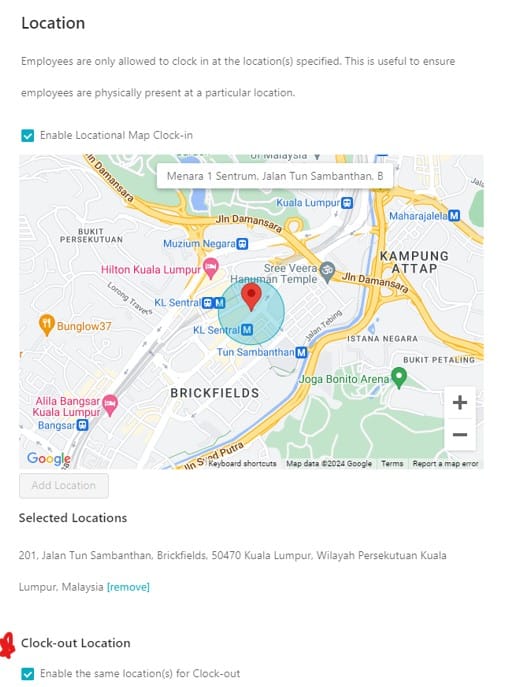
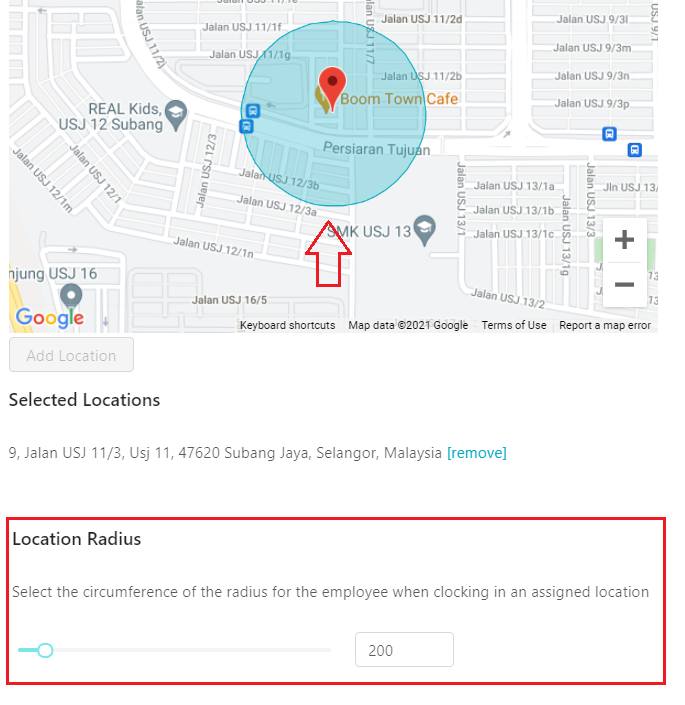
1.4.3) Location Radius
You may now select the circumference of the radius for the employee when clocking in an assigned location. The dynamic circle on the map works as you slide along the radius, you may zoom in or out the map to see the coverage.
There are chances causing the issue of unable/fail to clock in when a radius is being set in a very narrowed range. To avoid this situation, you are advised to set the circumference in a reasonable range.
1.5) Complete the shift
To complete the shift by clicking Save and the dashboard should have all the setup details.
2) Assign Staff
2.1) How to Assign Staff
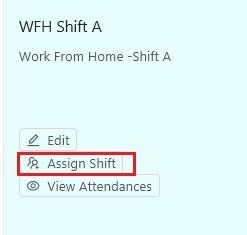
After completing the shift creation, Assign Shift will be shown under the shift created. Click on it.
There will be a pop up screen like below where the administrator will need to assign staff for this shift.
Quick tip: You may double check the shift time and day here before you click on assign shift.

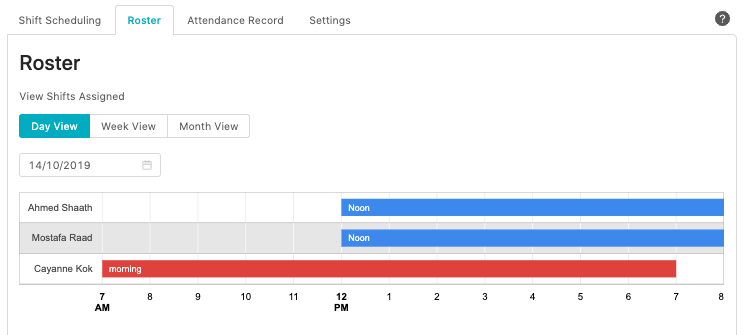
Once a shift has been assigned to the staff. On the Roster tab, the administrator will be able to select to view the roster as day/week and month or key in a specific date. A roster is a schedule of assigned shift.
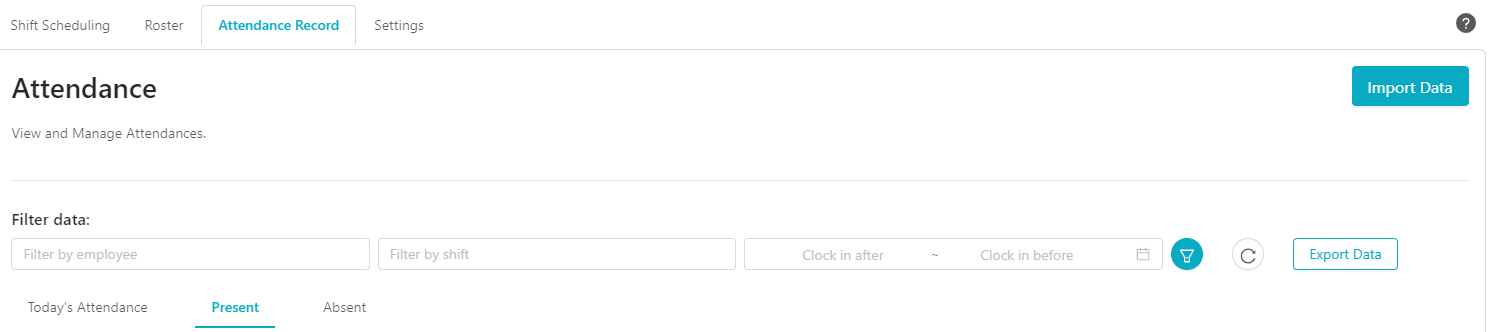
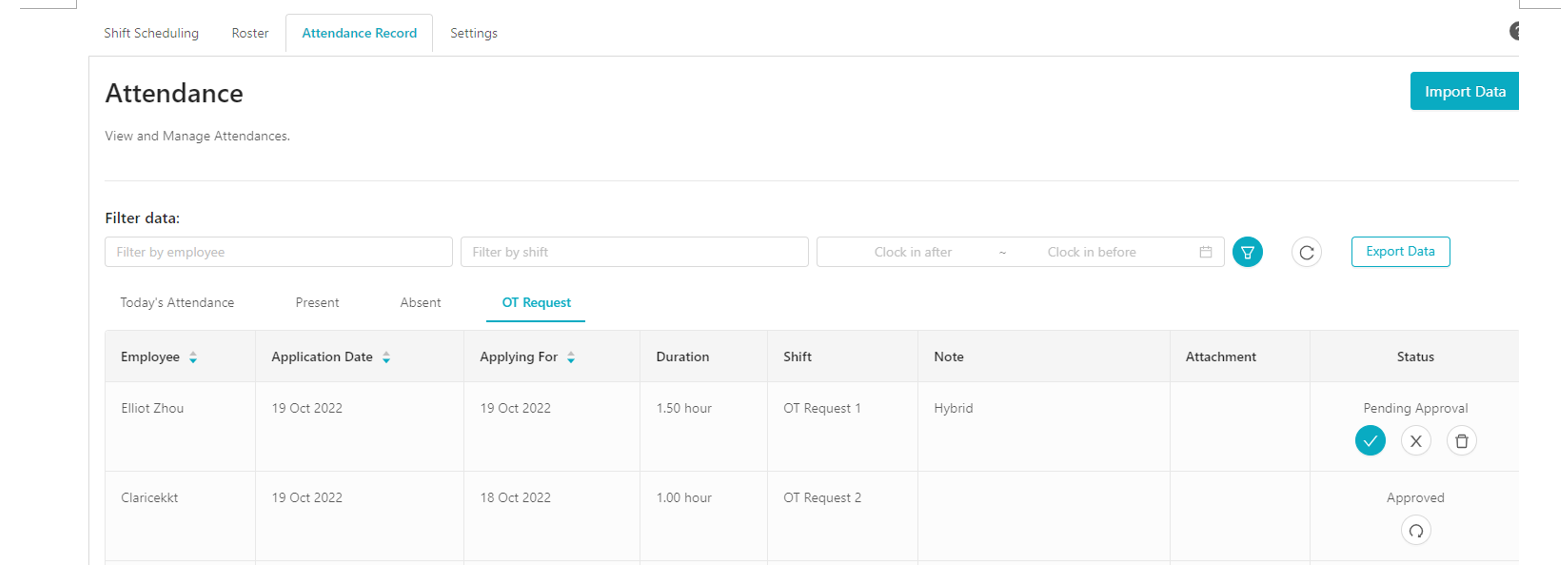
3) Attendance Record
The administrators view employees' attendance at a glance in this page. There are some attributes make available for admin's editing. For example, edit shift, worked hours, OT hours, allowances, and etc. Including the import and export employees' attendance sheet.
Employees are unable to adjust form and are only capable of viewing their own shifts only.
There are 6 different tabds under attendance record:
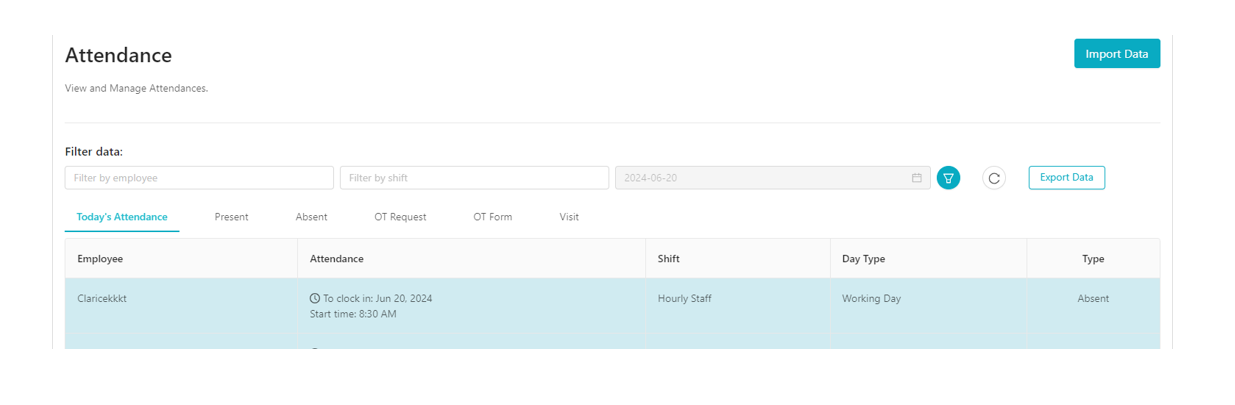
Today's Attendance: This tab will use the date of the day of checking and display if employees are present or absent.
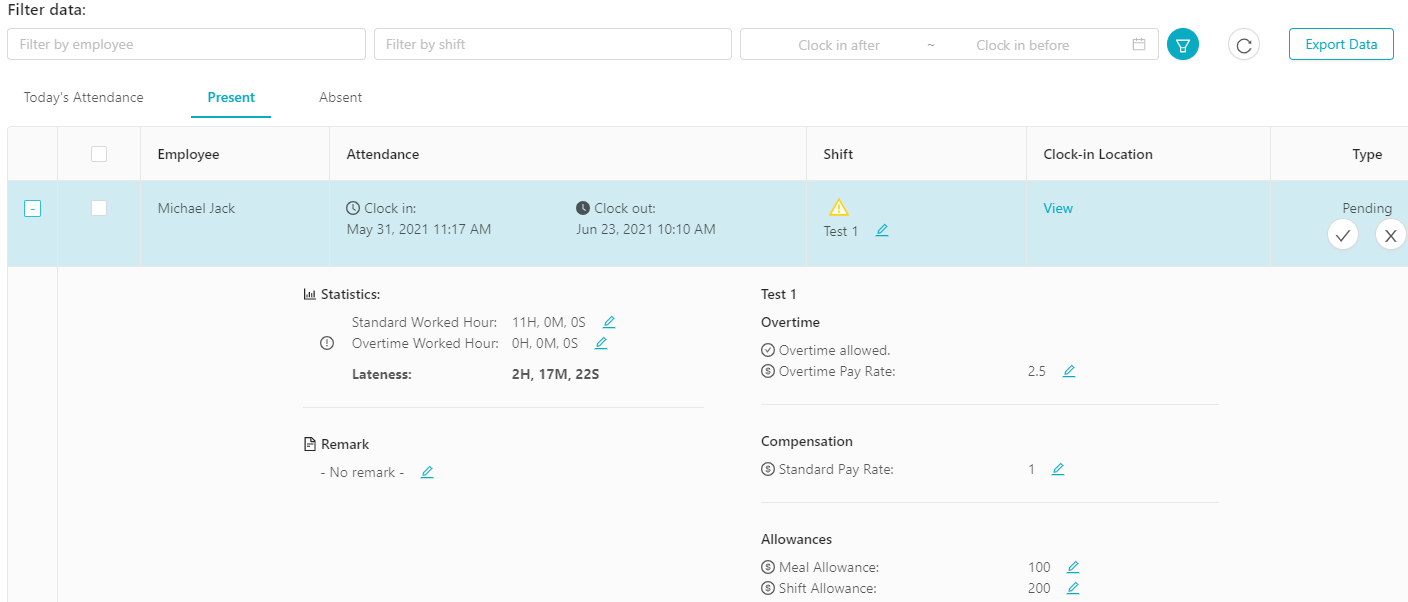
Present: This tab will display all the attendances of employees to date, and can be used to check if employees have clocked in or not. It also offers the filtering of date, which can be used to filter past attendances as well.
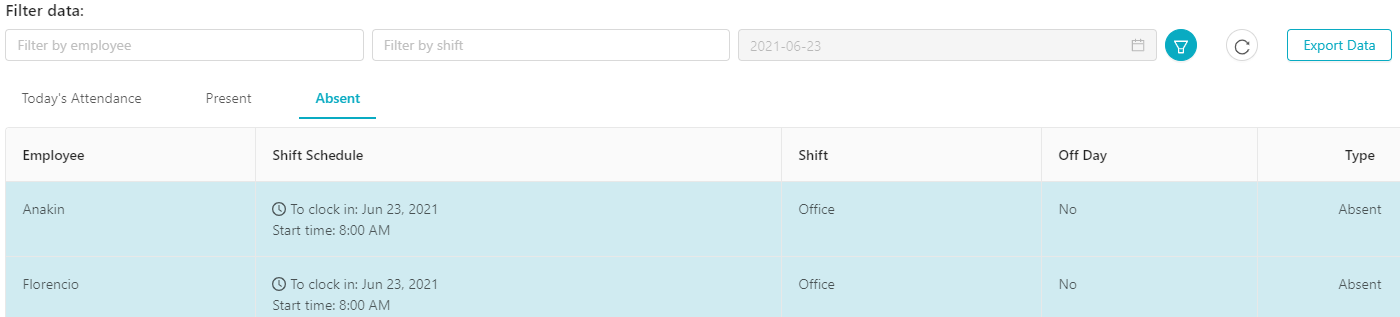
Absent: This tab will use the date of the checking and display all the employees that are absent.
All these 3 reports can be exported out into excel.
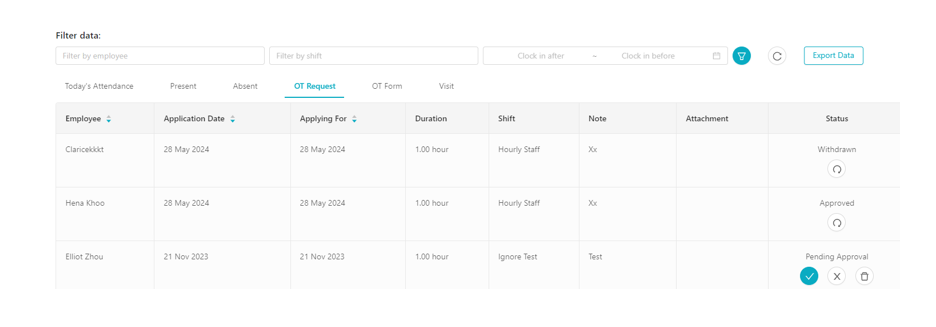
OT Request:This tab will display all the overtime request of employees to date.It also offers the filtering of shift, employee name and date, which can be used to filter past records as well. For more info about the usage and scenario, please refer to here.
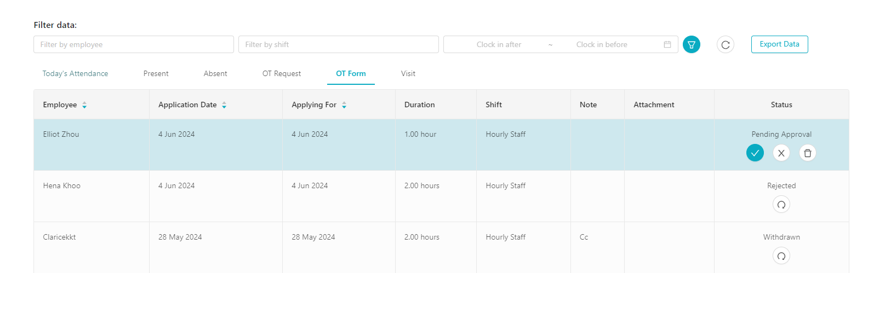
OT Form:This tab will display all the overtime form of employees to date.It also offers the filtering of shift, employee name and date, which can be used to filter past records as well. For more info about the usage and scenario, please refer to here.
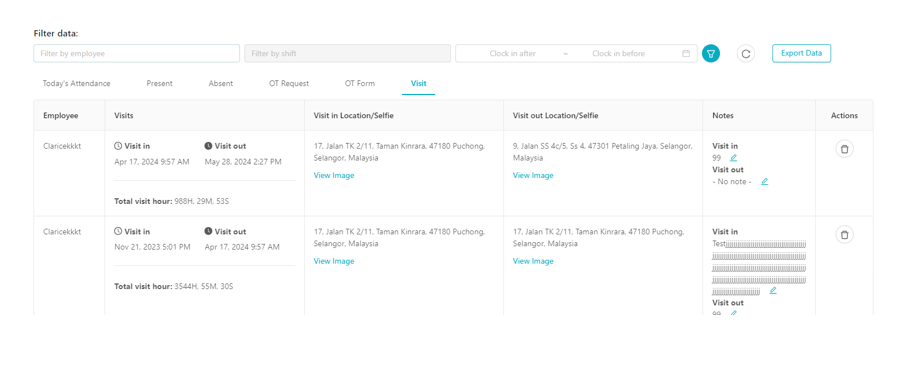
Visit:This tab will display all the visit logs of employees to date.It also offers the filtering of employee name and date, which can be used to filter past records as well. For more info about the usage and scenario, please refer to here.
3.1) How to Edit Attendance Record
Editing can only be done at the Present tab, Visit tab, either chosen OT request or form.
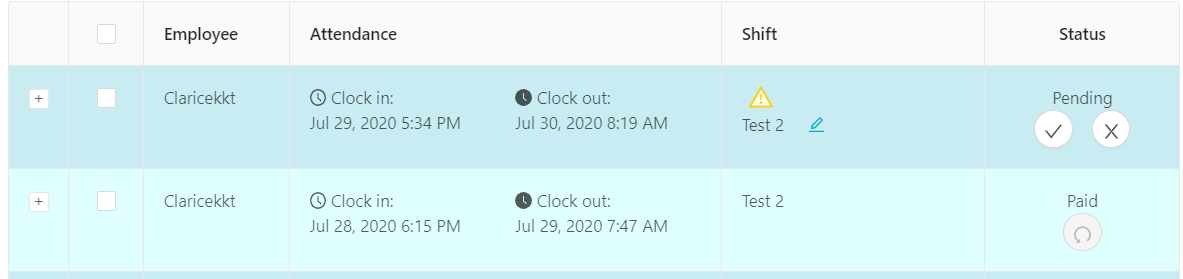
Here is the icon legend for easy reference:
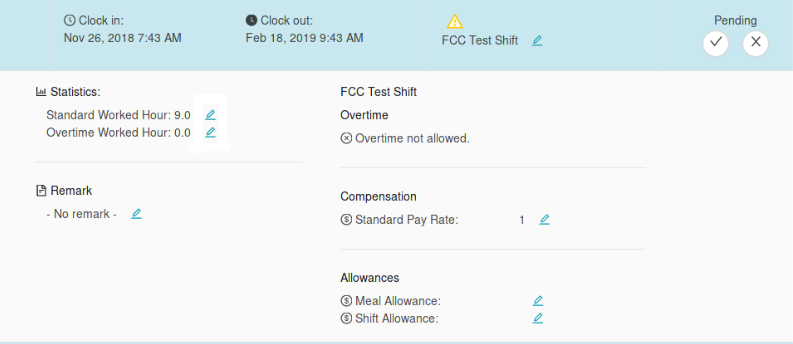
Click on the pencil icon to amend or to adjust the shift.
Just in case, admin needs to make some adjustment on particular record :
- Shift Name is editable.
- Standard work hour is editable.
- OT work hour is editable.
- Allowances are editable.
- Compensation rates are editable.
Quick tip: Once attendance record is approved and paid, you can no longer alter the attendance and shift.
3.1.1) Understanding the status of each attendance record
- Auto Approved – Auto-approval function applied and this attendance has been approved.
- Paid – This attendance has been paid via payroll
- Approved – This attendance has been manually approved
- Pending – This attendance still pending on actions
- Rejected – This attendance has been manually rejected
You can have the visibility of the fail to auto-approved reasons, such as

3.2) How to Search Attendees
The administrator can filter the attendee by their name, shift, and clock in & clock out time. In the event the administrator wish to reset the setting, you can press revise button which is next to Export Data.

3.3) How to Edit approve, reject or revert attendence record
The administrators may approve or reject by clicking on tick or cross.
In the event that the administrators may want to revert the approval, they can click the anti-clockwise icon to revert the status.
Quick tip: If an attendance is paid (integrated with our payroll system), you can no longer alter the status.
3.4) How to Import and Export Data
In the event that you need to import data from your current time attendance devices, just click on the import on the right corner, and upload the CSV file only.
Also, if the administrator needs to export the attendance record, just click on the export date right below the import icon.
4) Settings
4.1) Understanding the role of an Administrator
What does the role of Hadir Admin could perform here, for example:
- Create, view and manage shift
- View all staff attendance report
- Approve/disapprove attendance
- View and manage Hadir's settings
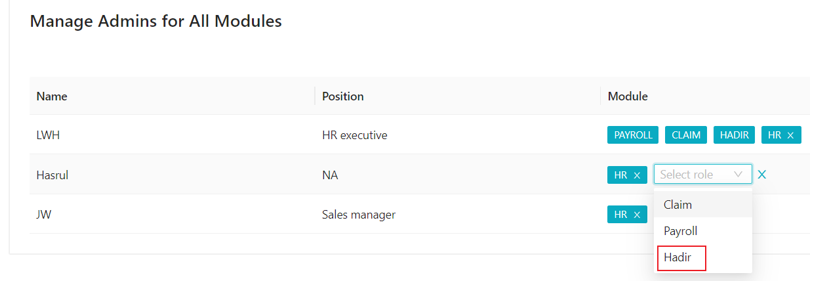
4.2) How to assign/delete Administrator (This setting has been moved to settings page under Manage Admins)
The administrator selects a user from the new Hadir admin. By adding a new admin, the administrator can add by searching the person's name.
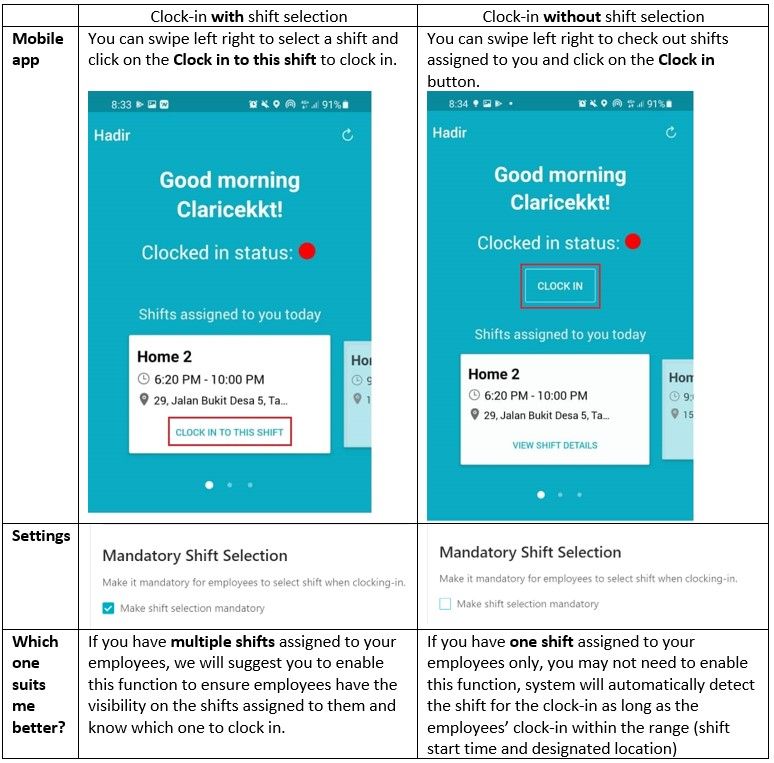
- Shift Selection Mandatory
This is a newly added function. You might wonder when should you enable this function and what's the need?
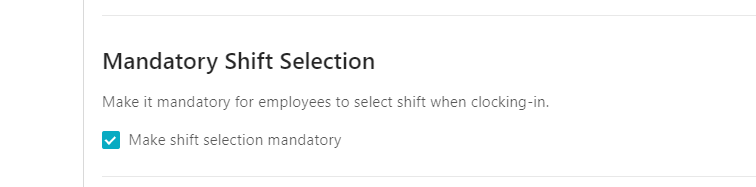
- If you have multiple shifts assigned to your employees, we will suggest you to enable this function to ensure employees have the visibility on the shifts assigned to them and know which one to clock in.
- If you have only one shift assigned to your employees, you may not need to enable this function, system will automatically detect the shift for the clock-in as long as the employees' clock-in within the range (shift start time and designated location)
Note: Please refer to below on Mobile app version for a quick overview on the difference.
4.4) Set the time for allow early clock-in
We used to preset the buffer as 30minutes for all shifts. Now, this new setting allows you to determine as anytime or a certain timeframe according to your company policy.
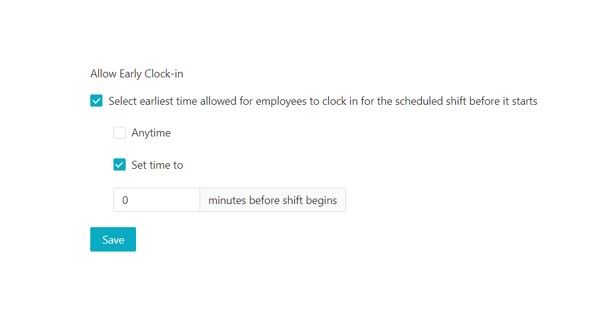
Note: This setting will have direct impact to the payable worked hours depending on the setup of Allow overtime and Ignore early clock-in in the shift scheduling.
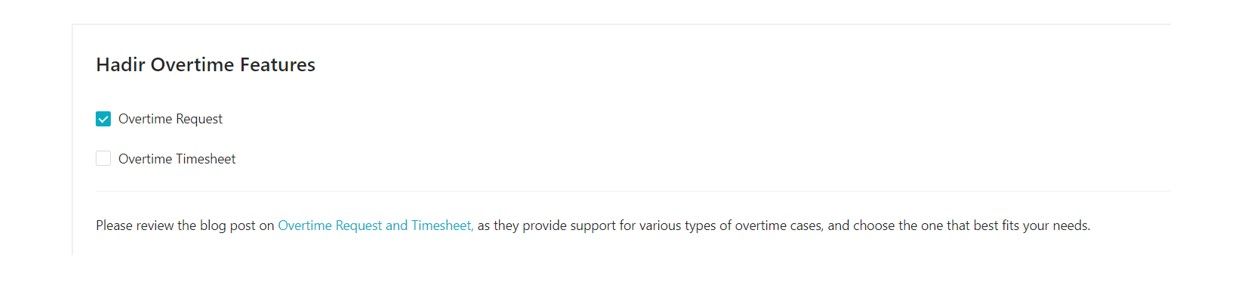
4.5) Understanding the Overtime Features
By default, overtime request is selected and if you wish to find out which is more suitable according to your company policy, please check out the guide here.
- Overtime Request
- Requires clock-in/out
- Overtime Form
- Does NOT required clock-in/out
4.6) Understanding Ignore Early Clock in.
Scenario A
Normal Workshift:
- Clock-in:9.00am
- Clock-out:5.00pm
- Working hours: 8.00 hours.
Employee A:
Punch in at 8.15 am and punch out at 5.00 pm, this employee total work hour = 8 hours and 45 minutes
Ignore early Clock in does not count on the time you start before your normal working hour, in this case, the employee A working hours are 8 hours only.

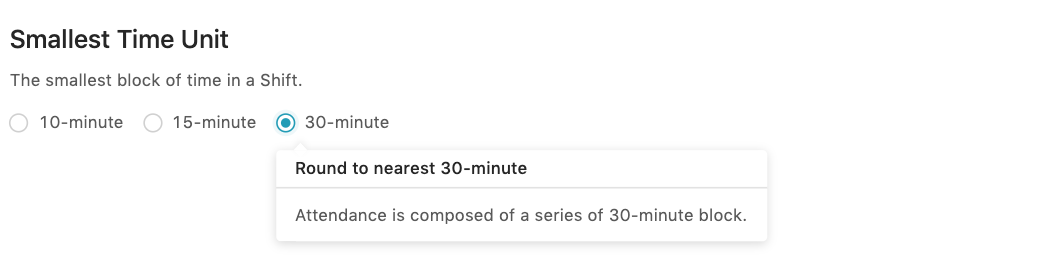
4.7) Understanding Smallest Time Unit and Round Policy
Smallest time unit is the
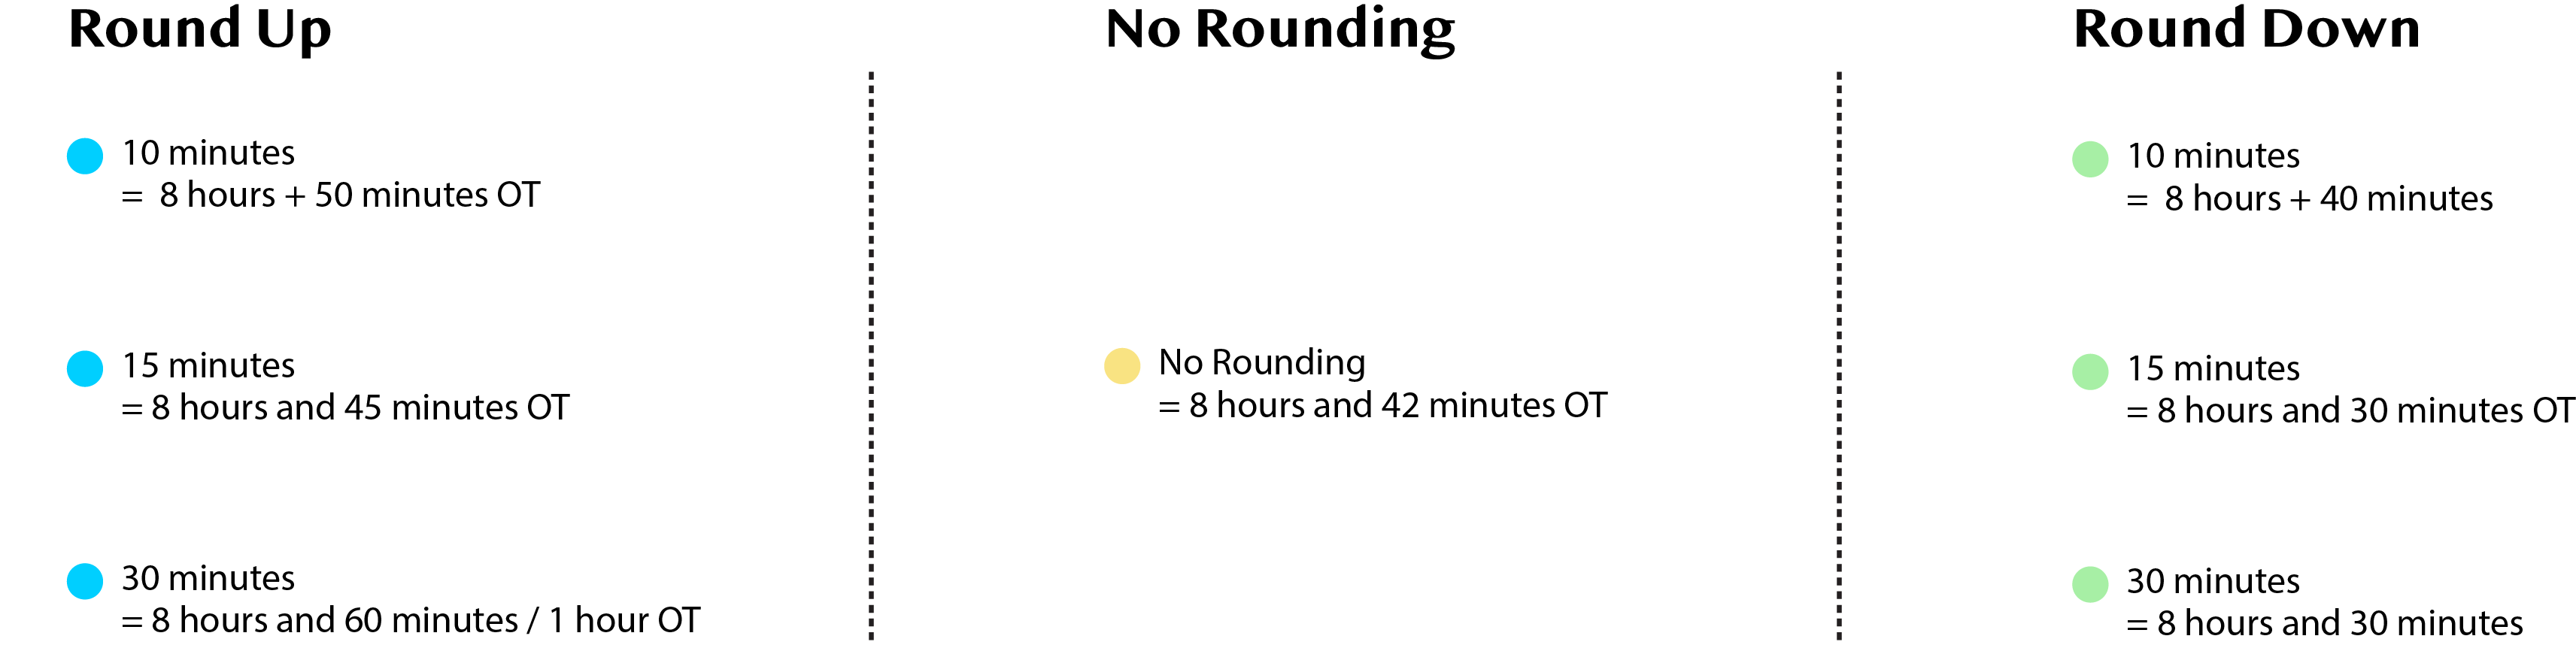
Rounding Policy:
The rounding policy is to round up or round down or no rounding when it comes to work extra hours.
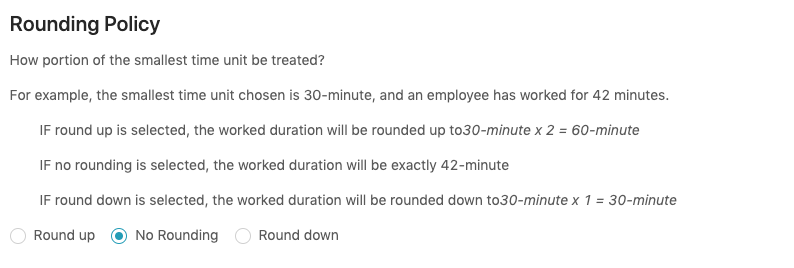
Scenario A
Ali works on 8 hours shifts as a service crew for a further 42 minutes. His total working hours are 8 hours and 42 minutes. Below is the summary of the Smallest Time Unit and how to rounding Ali extra work hours
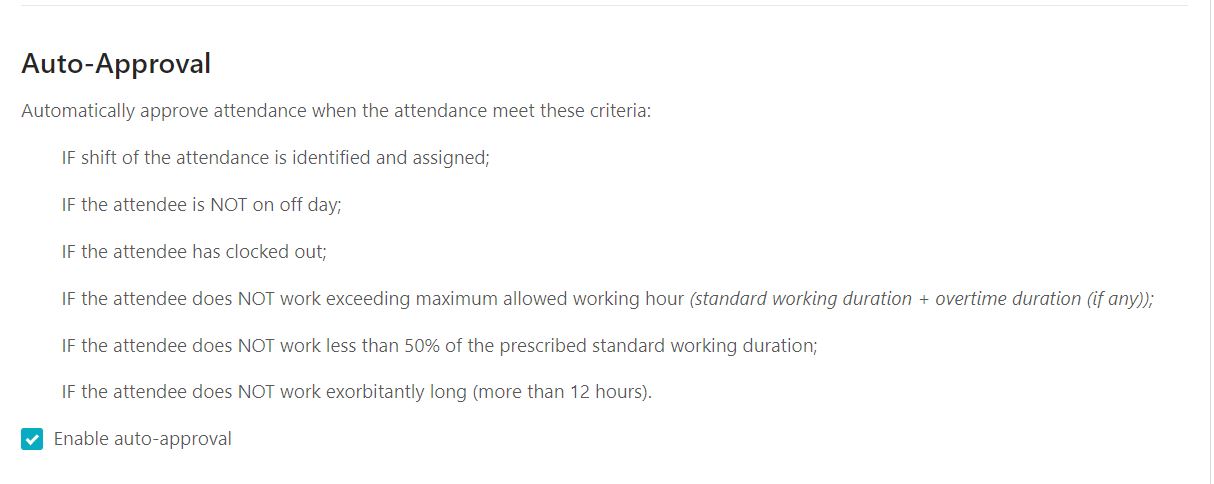
4.8) Understanding the Auto-Approval
We are proud to present this feature which it will save up your time and some manual work for example marking and approving attendance one by one. As long as criteria below are met, you will an auto approval takes place on the attendance record.
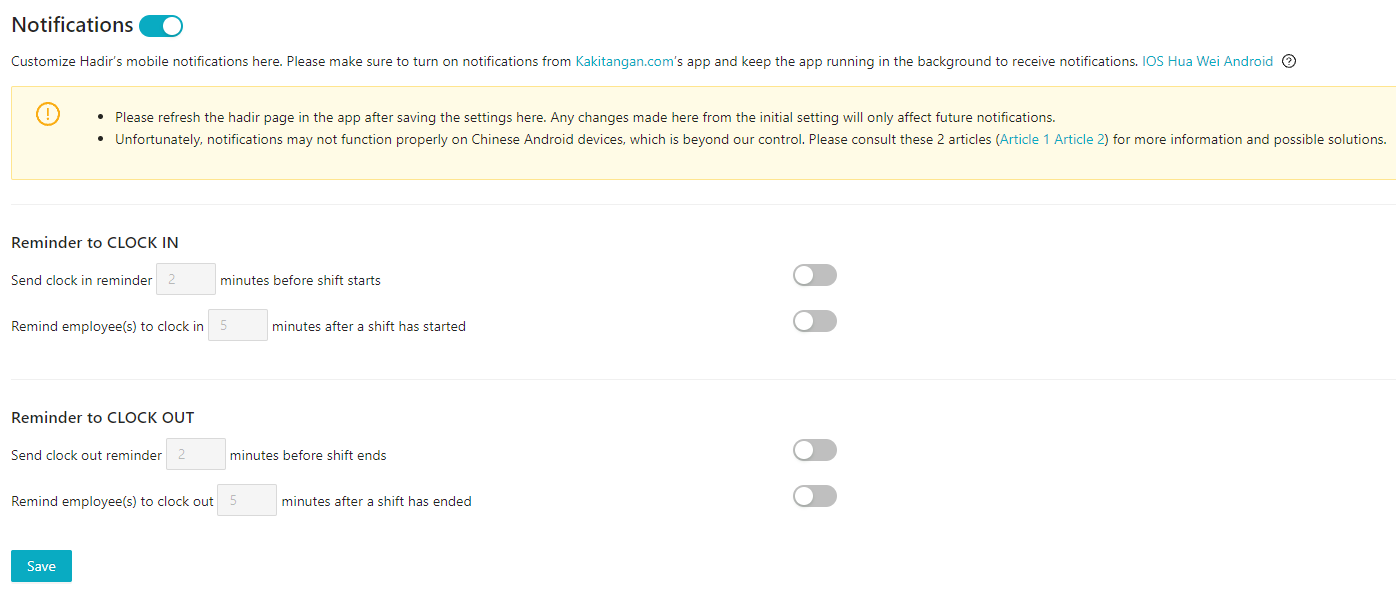
4.9) Understanding Hadir's notifications
This is a setting to remind employees to clock-in/out, before/after a shift. Please take note of all the copywriting in the settings as notifications in the mobile app can be tricky.
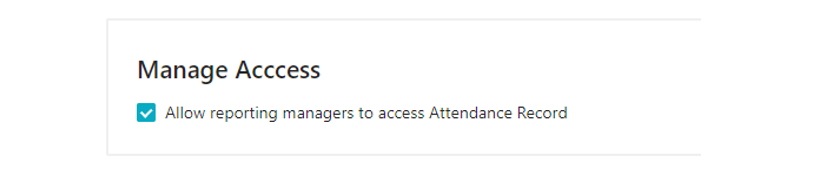
5.0) Understanding manage access
You may now allow reporting managers to have access to Attendance record page. The reporting manager will be able to manage including edit, approve, reject, withdraw the attendances/OT form/OT request/Visit of his/her subordinates.
About who is the reporting manager, you may refer to user profile -> Employment tab -> the field under Reports to.
5.1) Understanding Monthly Cut-off Date
Any attendance that are made after the cut-off date, will be moved to next month's payroll.

5.2) Understanding Visits
"Visits" differs from clock-in; it is primarily used when an employee travels to multiple locations, such as providing a service to customers. This feature allows you to track all the places the employee has visited. In contrast, clock-in is intended for tracking the shifts assigned to the employee.
Do take note that "Visits" will not affect payroll, and is purely for record purposes.
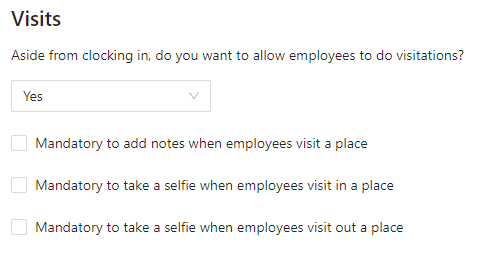
You may set the conditions for each visit as well.
Understanding the overtime options
1. Overtime Clock-in
If you wish to perform clock in for overtime only, this is the option. The total worked hours from the overtime clock-in will be calculated as overtime worked hours.
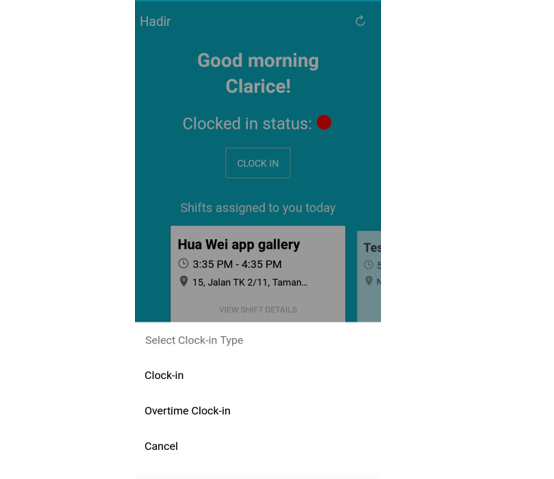
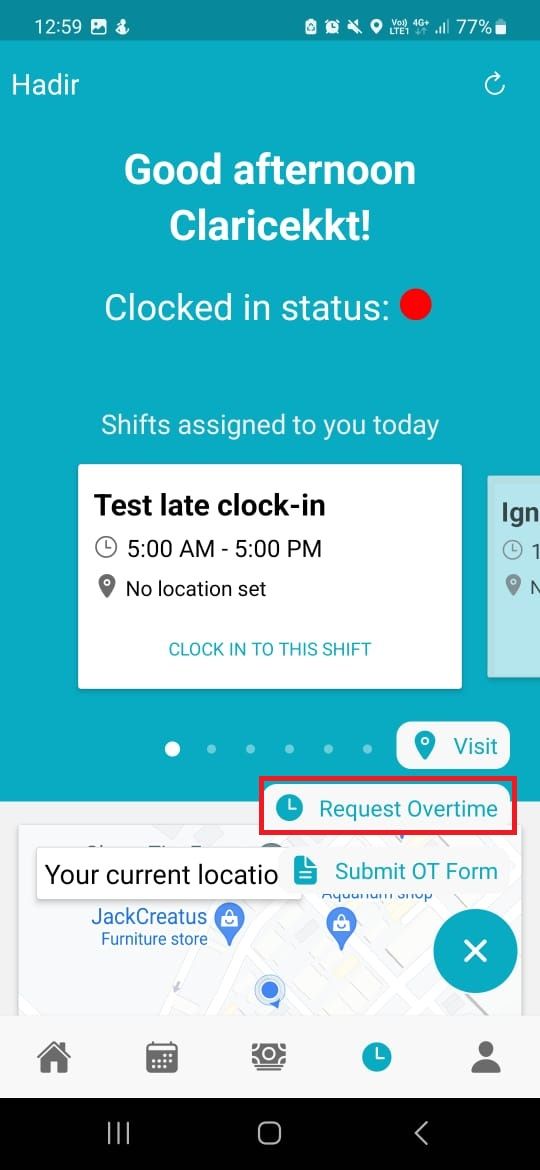
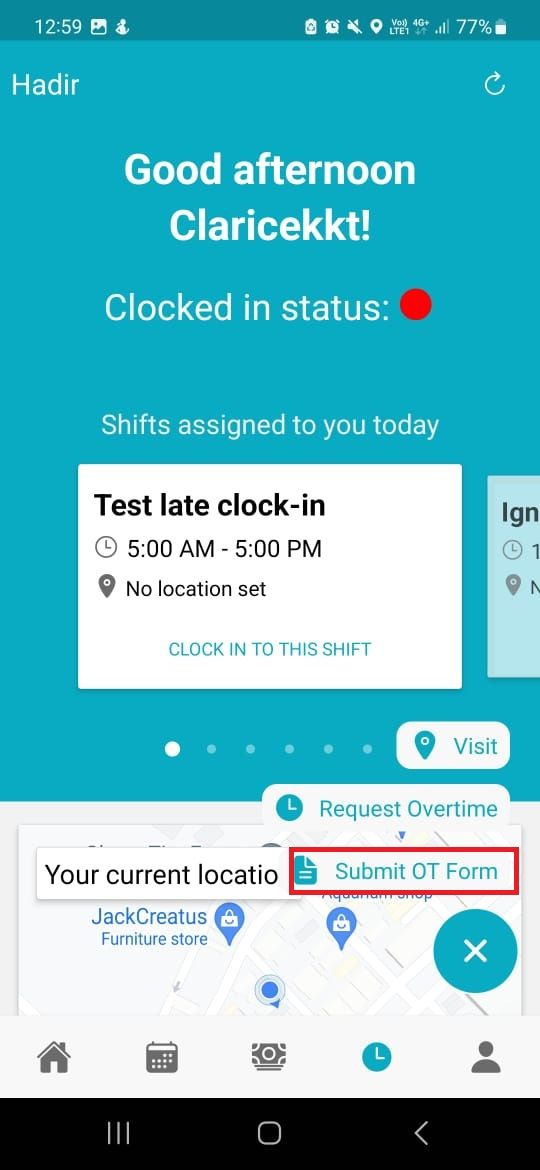
2. Overtime Request
It works like a digital overtime submission form. Now, the employees get to submit an overtime request to admin for approval via mobile app. Admin could submit the request on behalf as well. The approved hour(s) will have impact on the overtime pay.
Tip: The guide here has included the potential scenarios of overtime request and how you might make full use of the feature.
3. How do Overtime clock-in and request work together?
There isn't a precedence of which to come first.
So, an employee can peform an overtime clock-in first and submit an overtime request later, and vice versa. Eventually, both will need an approval from the admin to determine the final overtime worked hours and overtime pay.
- Admin can perform approval/rejection from mobile app or web here, and also exportable in excel file. All view in one glance, to cross check with the present attendances as well.
4. What is the major difference between clock-in and overtime clock-in?
Clock-in - You will have a standard working hours to be fulfilled first before the overtime starts.
Overtime clock-in - All hours will be deemed as overtime working hours.
5. Overtime Form
Similar to Overtime Request, it works like a digital overtime form and requires approval to get the overtime pay. The only difference is that Overtime Form doesn't need employees to do clock-in/out.
Tip: The guide here has included the potential scenarios of overtime form and how you might make full use of the feature.
Attendance Summary Reports
Unlike the data reports available in Attendance table, Hadir summary reports provide you some useful data insights about your attendance data, such as
- Total absent day
- Total hours of In Early, In Late and Out Early, Out Late
- Total payable overtime hours
- Total actual worked hours
The reports are good for cross checking on payable attendance hour and amount in payroll module as well.

How to streamline within the system
In order to integrate the system, please go to
A) Payroll -> look for Settings
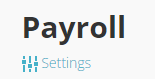
B) Settings -> Hadir Time Management
Tick enable auto-link Hadir time management with payroll
Note: If it's your first time linking this service and wanted to check how it works to link with the payroll, you can always reach out to our onboarding team. Suggest to test it after your monthly payroll has conducted.

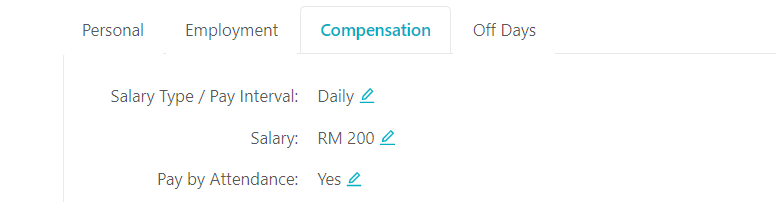
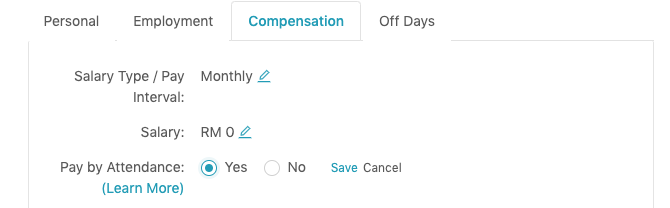
C) Go to Users page >"select user name"> Compensation
Tick yes to Enable Pay by attendence
Mobile version
Currently Admin and Employee have the same view on Hadir Mobile app.The mobile verson is mainly for an employee to clock in and clock out, have the visibility on shift details and worked duration.
We provide three clock-in methods:
Note: More details for mobile app clock-in, please refer to this guide. [New release by 12th Feb,2021]
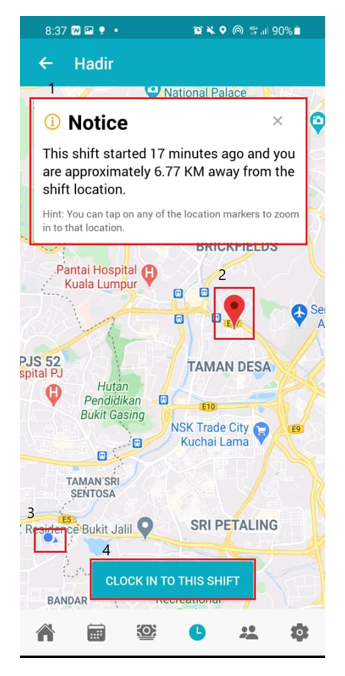
Geo-location
Once you enabled the locational map clock-in, employees are only allowed to clock in at the location(s) specified. This is useful to ensure employees are physically present at a particular location.
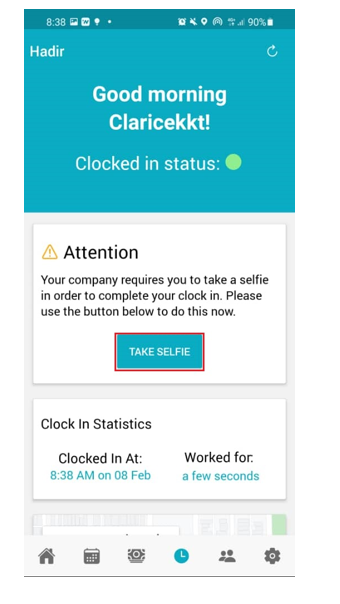
Selfie clock-in and out
After the setting is enabled, when employees click Clock In in the mobile app, take a selfie button will show up, click on the button to take a selfie.
After you have taken a selfie, the buttons will change to Take Selfie & Clock Out (if taking a selfie for clock-out if mandatory) and Start Break.
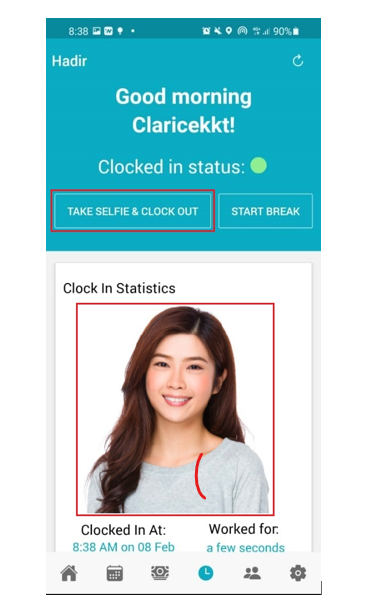
With this, you have successfully clocked in via selfie!
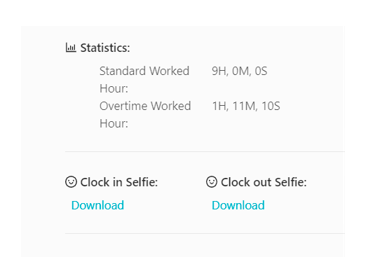
For admin to check the selfie taken by employees, go to Attendance Record and click at + to expand and view more details. If selfie were indeed taken, the download button will be shown and admin can download to view the selfie of clock in and out.
Hope it helps you to understand more about Hadir. For more queries, please reach us at support@kakitangan.com or via the live chat at the bottom right corner.
Stay tune, we have more features coming for Hadir!
 Kakitangan Blog